

Well this is a jewel in the crown for my Seiko collection. This is a watch that any hardened Seiko collector or movie memorabilia collector would want in their collection. The watch had two varieties the black one that I have and as silver coloured one. They were made famous because they featured in Aliens the movie which was the second movie in the film franchise.
This watch was actually designed by the famous car designer Giugiaro who gave us cars like the iconic DeLorean DMC-12. The idea behind this was a watch for autosport. the asymmetric design has a side housing with two yellow pushers which operate the chronograph function. This is designed to help the racing driver time his performance easier.
So onto my watch and how I came to own one. It is an interesting story so please read on. Obviously the watch had issues as nothing is ever straightforward with my projects.
I took the watch in as a trade for some service / repair work from a fellow YouTuber Mr Elliot Coll who owns a channel called The Retro Future. Its all about repairing Gameboys and other hand held gaming devices from the past.
Elliot has a keen interest in watches and already owned an “Aliens” but it was missing the side housing and the pushers. He was able to find a donor non running watch on a Japanese auction site which he bought to use the side housing parts for his working one. The donor was then cast aside. He contacted me to work on one of his Seiko watches including one he had bought as a birth year watch for a gift for a family member. I did a video of this one on my channel its a Seiko 8306 and you can see it here: https://www.youtube.com/watch?v=H2E-_o9pezw&t=2482s
Elliot offered this 7A as payment for the work, He was clear that it did not run, the stem had snapped in the crown, the chrono hand was bent and that it would need the side housing and pushers. I accepted his offer! how could I not. A chance at owning one of these along with the challenge of fixing it!
Here is the watch as it arrived to me.


The first challenge was to see if anyone on the planet had the parts I would need. I was able to find the part numbers for the housing and the pushers and I then proceeded to search every last corner of Google in an attempt to find them. After an hour or so of searching I came across a post in a watch forum with a guy selling the parts. The post was from 2017 but they had bumped the post for a few more years thereafter giving me a lead that perhaps he still might have them. I recognised the “avatar” name of Acid Stain. I went to the forum I used the most back in the day which is Wristsushi. I searched the members and found Acidstain. So I sent him a PM and crossed my fingers.
Possibly 24 hours later I got a reply. It was the one I had hoped for he still had the parts! He sent me some photos of parts as proof.


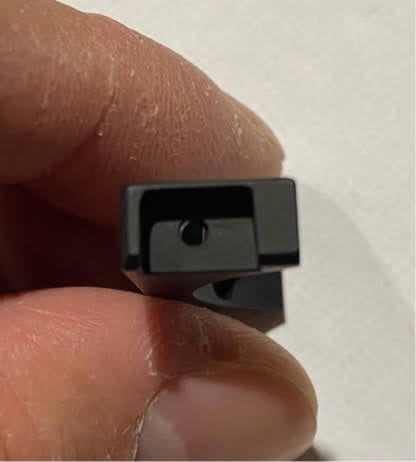
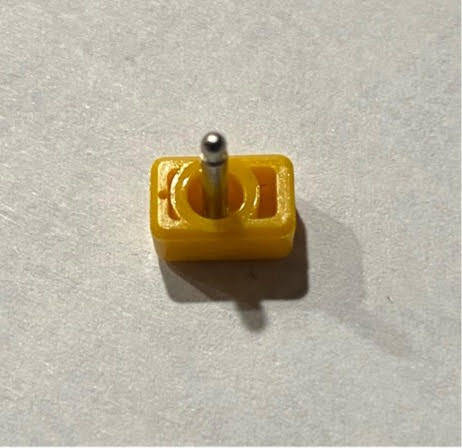

As you can see all new stock and actually have their original Seiko packaging. The price for the parts was way over what I had anticipated and he held firm on the price but threw in postage from USA to UK for free. I knew I didn’t have a choice, these parts are so rare. My saying is “the right time to buy is when you see it” so I acted on this and paid what he wanted. He knew what he had and fair play to him really. My justification was that I had not paid anything physical for the watch only my time and skill on repairs so to pay out for these parts was acceptable. My watch is in very good condition and new parts would complement it well. Its also that must have watch with a price tag to match.
So now with the hard parts ordered I set about trying to fix the other issues. First up was that interesting orange second hand. Without removing from the pinion I tentatively used some thick tweezers right on the bend. I gripped hard and turned the opposite way. This was incredibly nerve wracking, Heart beating fast with the thought if it snapping completely running though my mind. After a few firm nudges I got to to as close as I dared. Its still not spot on but it will do. Sourcing this hand could take years so for now its staying where it is.


Next I dropped a battery into the movement and to my surprise / relief the watch started ticking! this was very pleasing as it meant that nothing was majorly wrong with the movement. So next up to tackle the broken stem in the crown.

Like everything to do with this watch a stem is hard to find and a black crown even harder. I first tried the alum powder trick as shown in my video here: https://www.youtube.com/watch?v=h5hoiQ45-mw&t=29s I was worried that the hot alum powder would remove the PTF coating but it did not. However it did not dissolve the stem. This must have been made of stainless steel. Alum does not work with stainless…

I remembered when I broke a rare Zodiac crown in the same way that I could try my homemade lathe trick. I do not own a watchmakers lathe so I had improvised with a combination of a pin vice, a cordless drill and some very steady painstaking work. I would attempt this again.
I used a 0.5mm drill and as my cordless drill chuck won’t close and hold such a small drill I used a pin vice to clamp the drill and then put the pin vice in the drill chuck. It looked completely stupid but worth a try.

I then clamped the crown into a jewellers ring clamp as its jaws are leather it will not mark it. Then its just a case of holding the clamp and rotating the drill slowly. The first part is the hardest as the drill wants to dance all over the place but with persistence and pressure it finally bite into the stem. Its a lottery if you can drill dead straight or not but I took a chance.
I was successful, a hole was drilled and you can see in the photo below that there is a small steel sleeve left in the hole. This is just the remains of the stem. I chased down the hole with a 0.7mm drill as is was the next I had. It was dodgy because the stem was 0.8mm.

I was feeling pleased with myself so I hand tapped the hole to 0.8 which was not good. The tap would not cut as the hole in reality was too big. This proved to be a mistake I should have tapped with the sleeve left in. I put it all aside and left it. I could do no more until the housing and pushers arrived.
A number of weeks later and the postman had been!

Good things come in small packages. This photo is a good reference tool for anyone else looking for these parts as it shows the part numbers you would need to search for.
Also contained in the parcel was a stem! not only that but the stem was 0.9mm! this meant I could tap the hole in the crown and finally sort that part out.

Despite all my excitement there was a massive elephant in the room, I knew about it before purchasing but I will only now discuss. The black housing despite being new old stock (NOS) did not have any pendent tubes fitted to the ends. This watch needs steel tubes , like a pendent tube on a normal watch that the crown and stem fit into. the tubes on the housing are there to guide the yellow pusher shaft down to then side touch some fixed flat pushers on the case. Also in the tube I would need a spring and an E or C clip to hold the pusher in place. The tube would need an inner shoulder / land inside where the spring would sit, it would have to be the exact length. The diameter would be bigger on the exposed top portion and smaller below to fit through the housing.
Why on earth Seiko did not fit these as standard to their OEM parts is a mystery as you cannot find a part number for them anywhere. Its like they don’t exist. I had mentioned this to Acidstain and he kindly included some pendent tubes he had that he suggested I could perhaps get machined to fit.
After posting this dilemma to my Facebook group one of my closest watchmaking friends stepped up. This man is a legend in the Seiko community and despite his humble nature I class him as an expert in all things vintage Seiko. What this guy does not know about Seiko movements is not worth knowing. His name is Simon Wilkinson, often known online as Siralan.
Simon has a lathe and is still getting to grips with it but he was confident that if I sent the watch and parts to him that he would be able to sort this. He was actually excited to take on the challenge and I was extremely happy to send it.
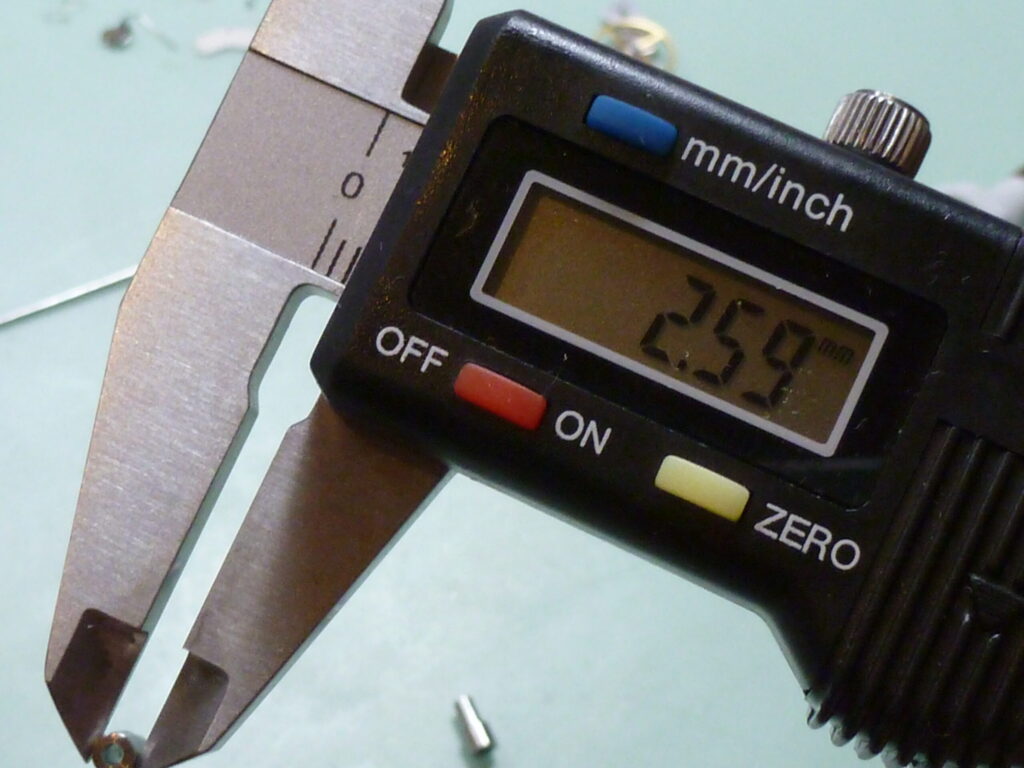
Fortunately Simon also has this watch in black and the silver versions so was able to take some measurements from his own to aid the turning of these parts. Below are some photos of some of these measurements which may help others stumbling across this post.

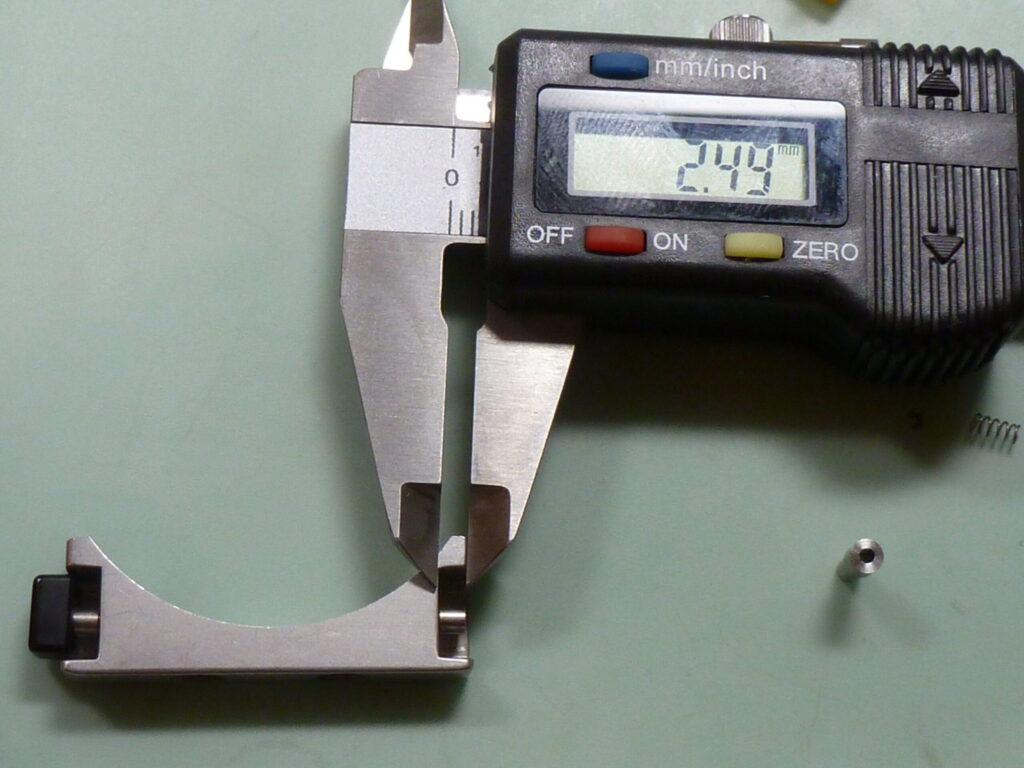
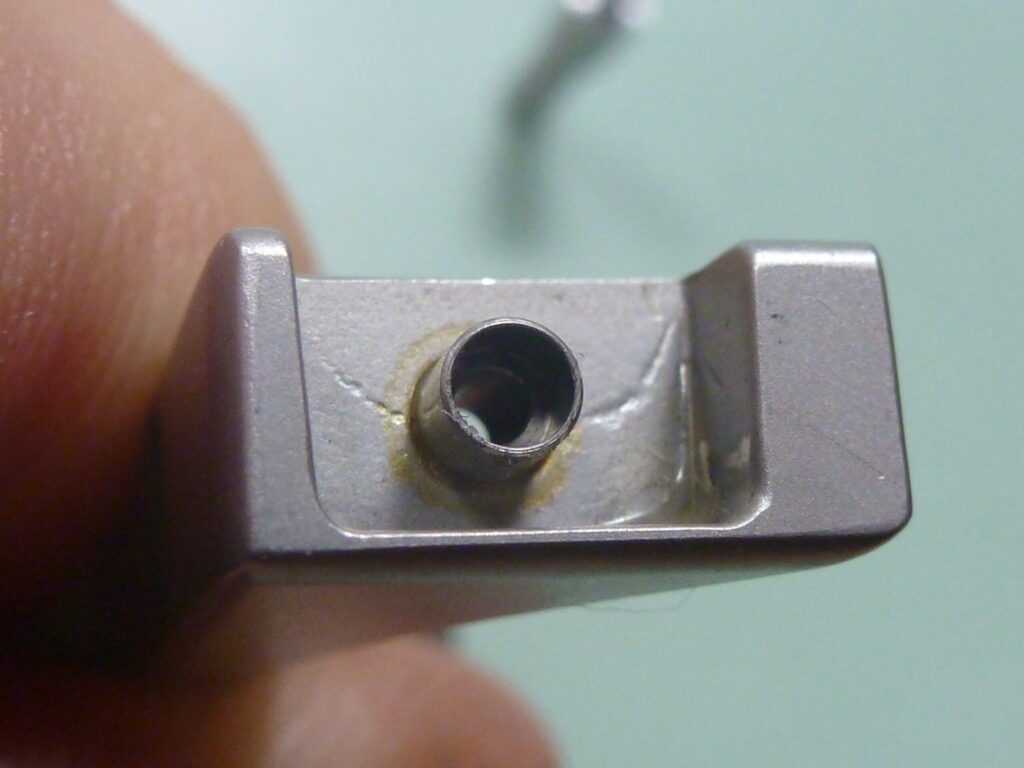


With the measurements in hand Simon was able to turn the tubes to size. This being done on a watchmakers Lathe and very carefully. We are talking very small diameters here and from solid bar so not only would they need turning on the outside diameter but they would also need drilling through whilst also leaving a shoulder inside for the spring to sit on. This is precision work and I am pleased to Say that Simon has the skills necessary to achieve the accuracy required.

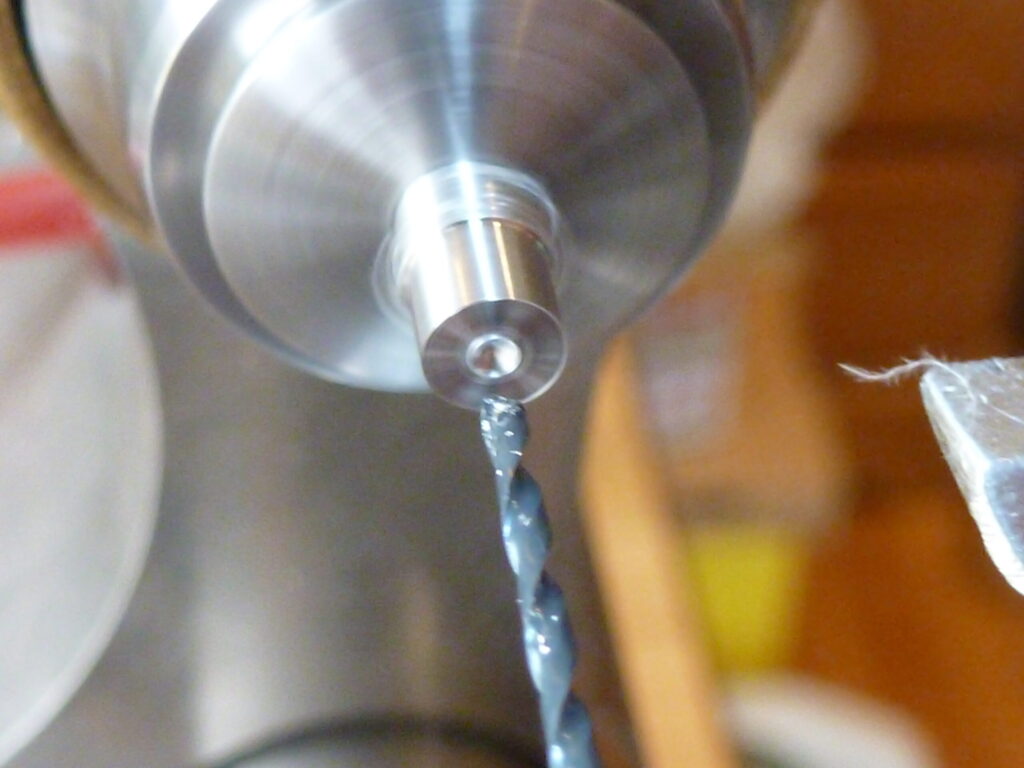
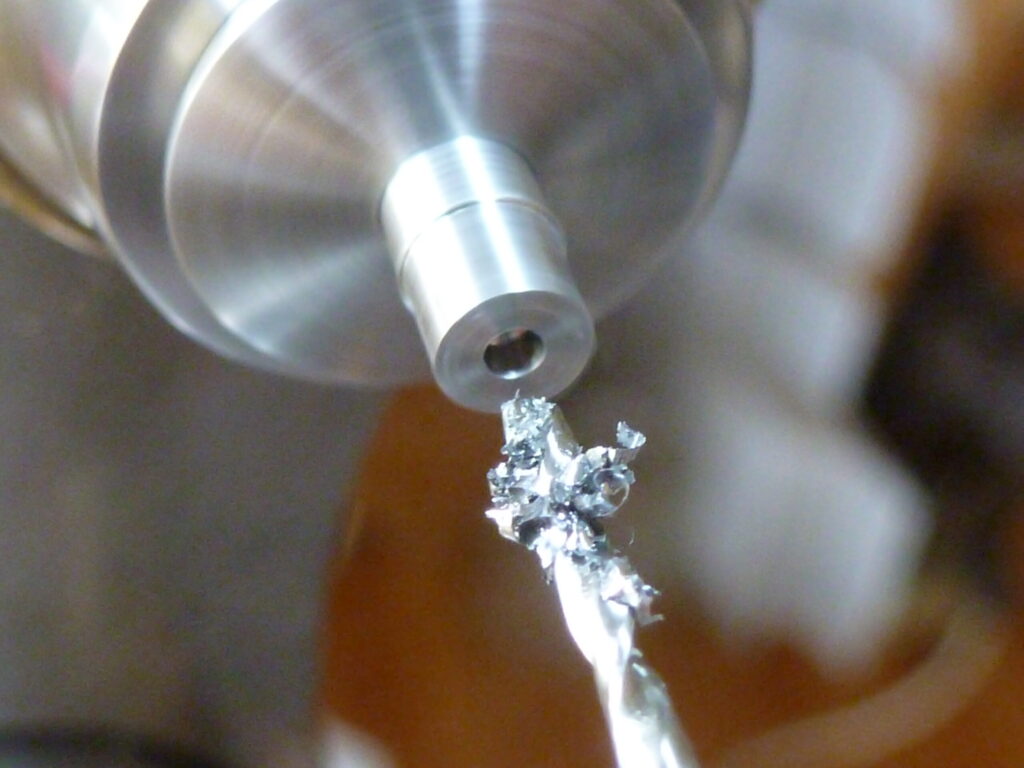
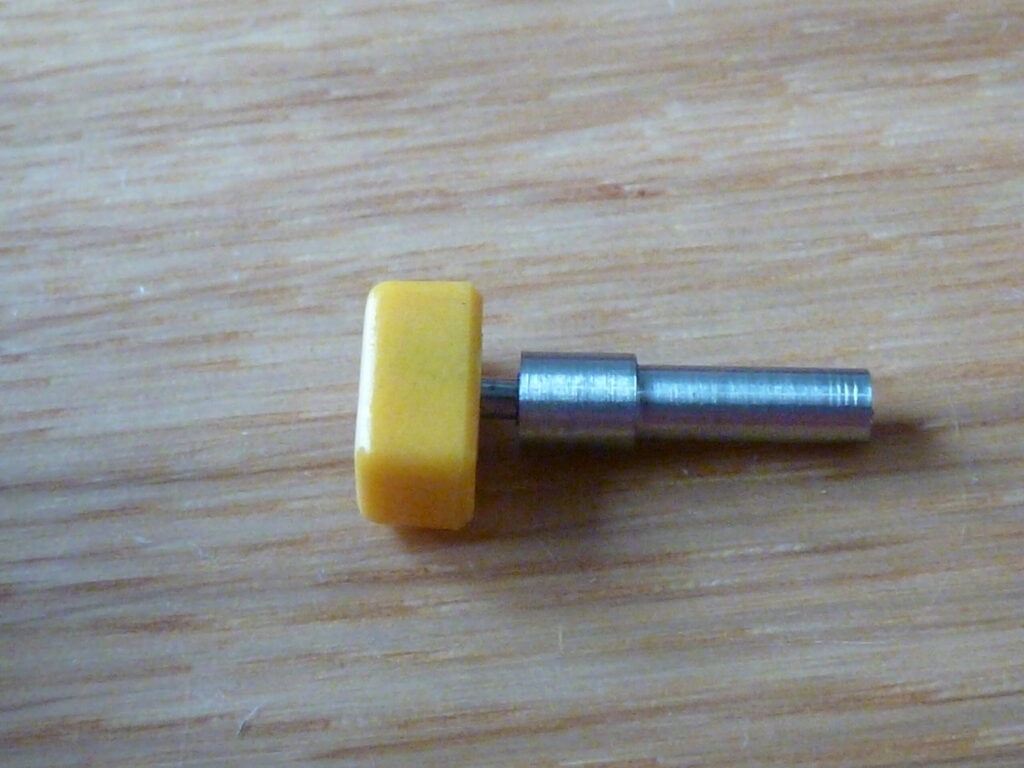
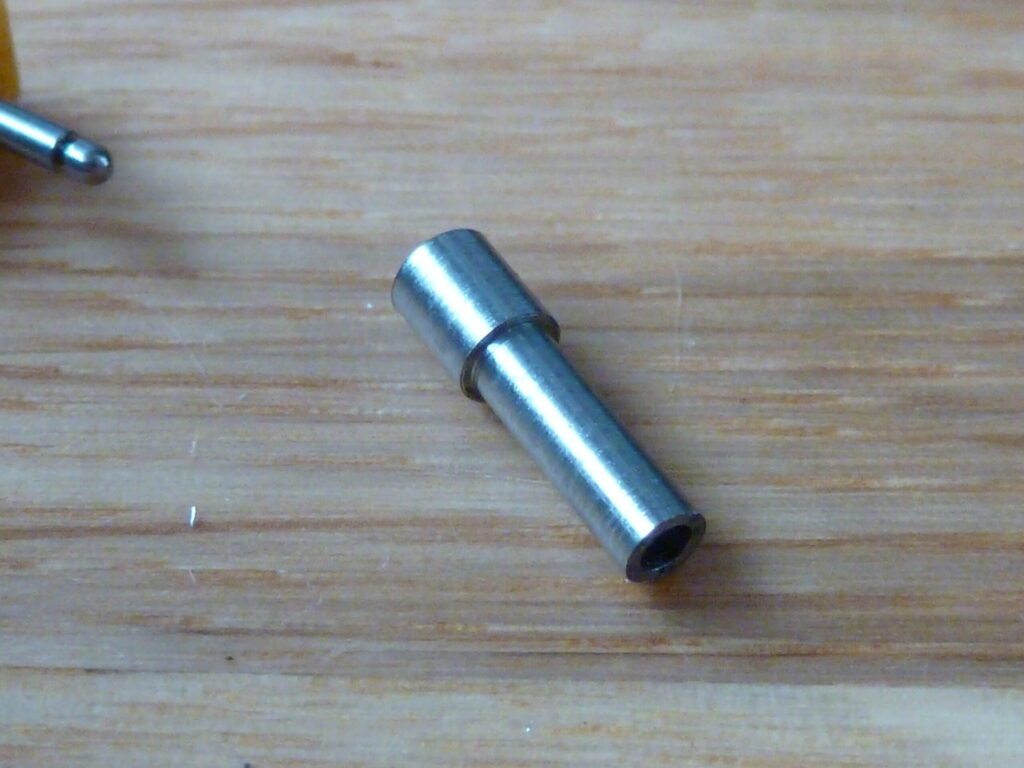
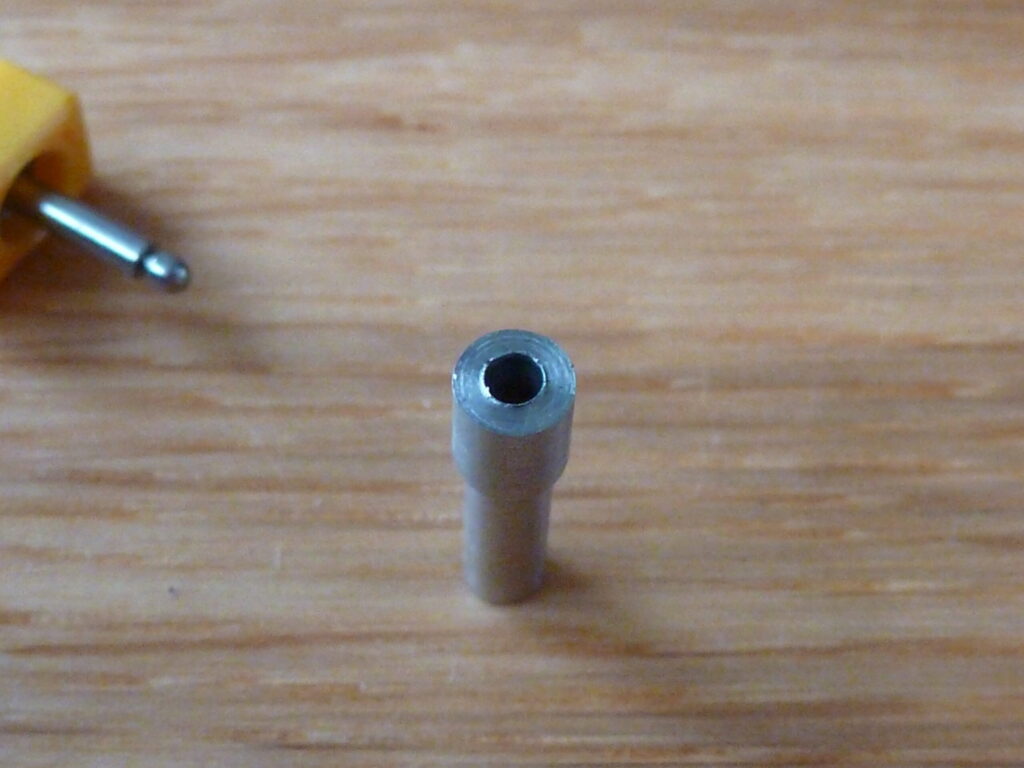
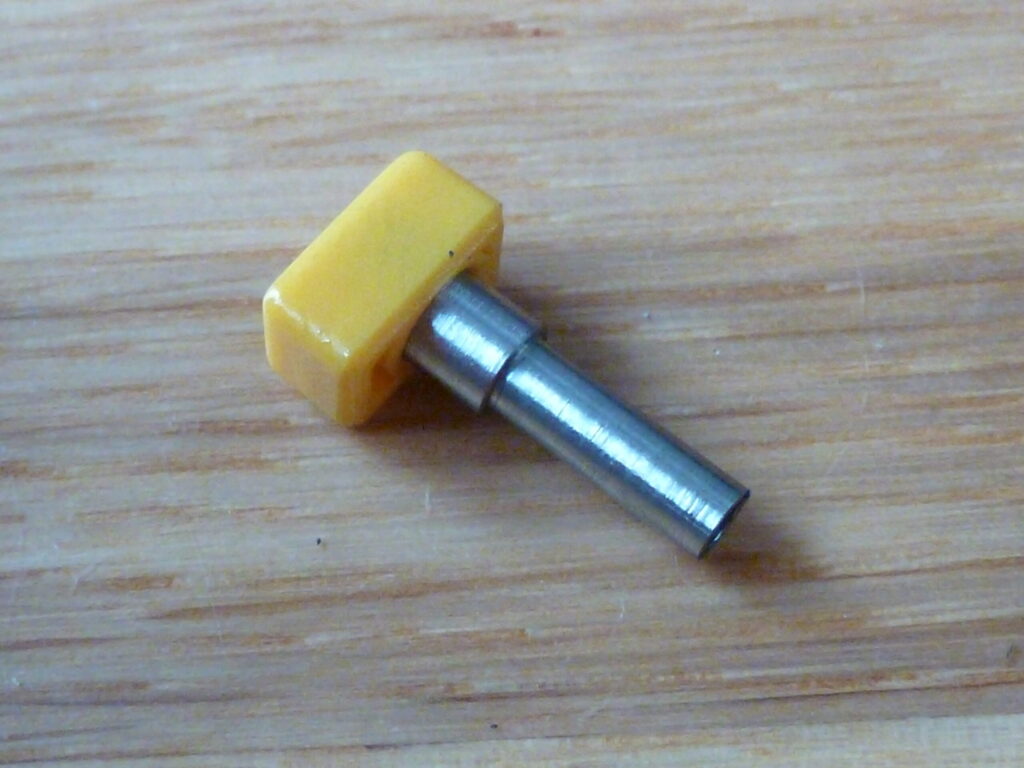
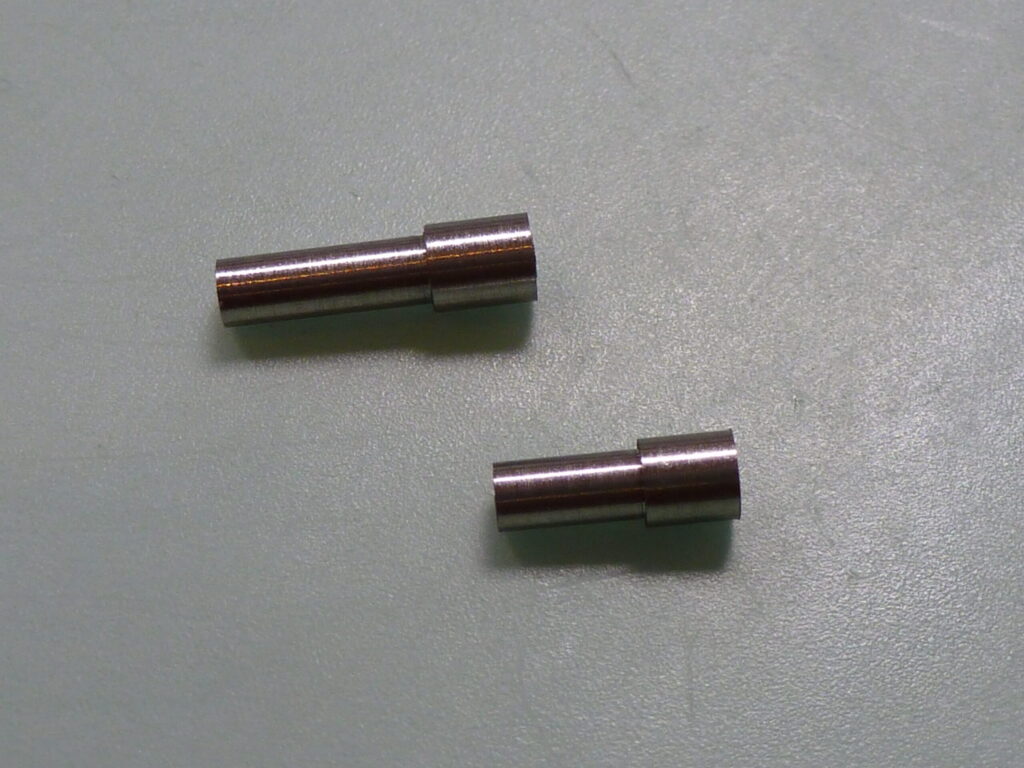
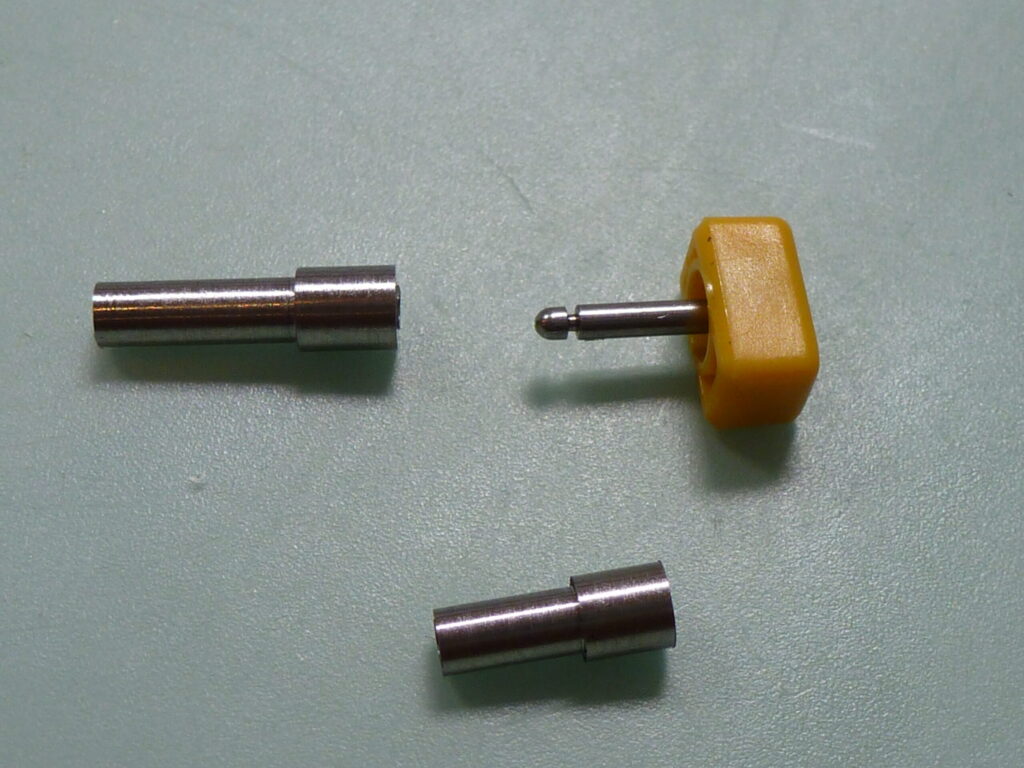
The tubes are then parted off to correct length. Next would be the installation. The original Seiko tubes are glued in so we did the same and used epoxy to secure the tubes to the housing.
Next the spring would need shortening to suit before the pushers could be assembled and secured by the all important e clips.
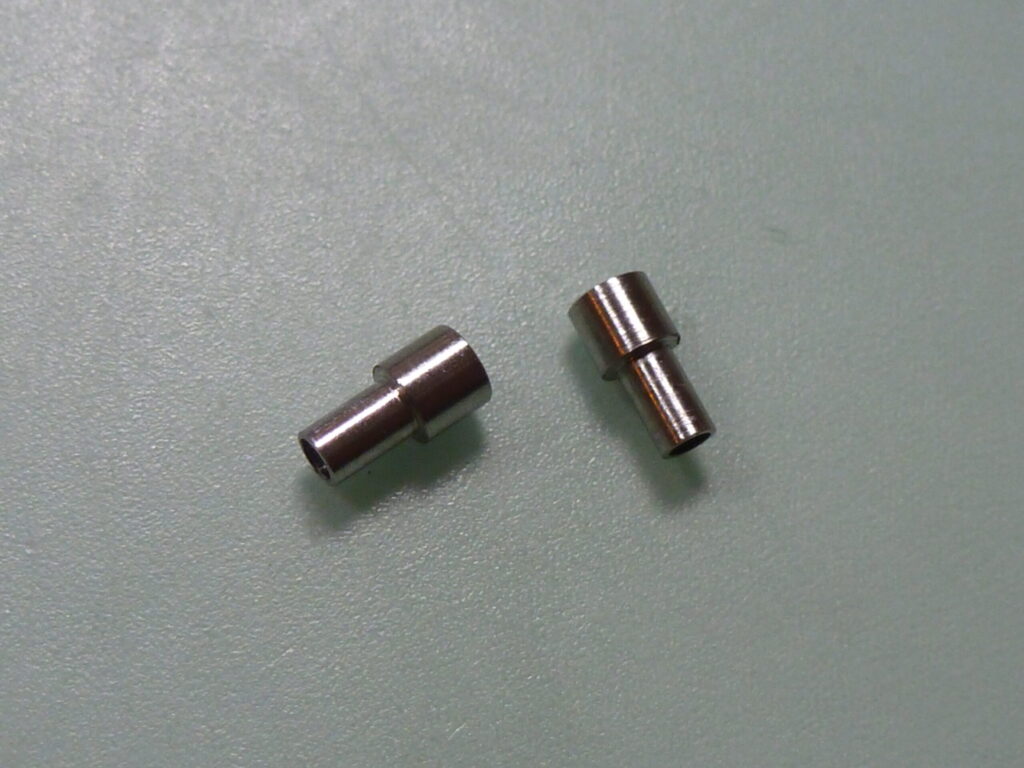
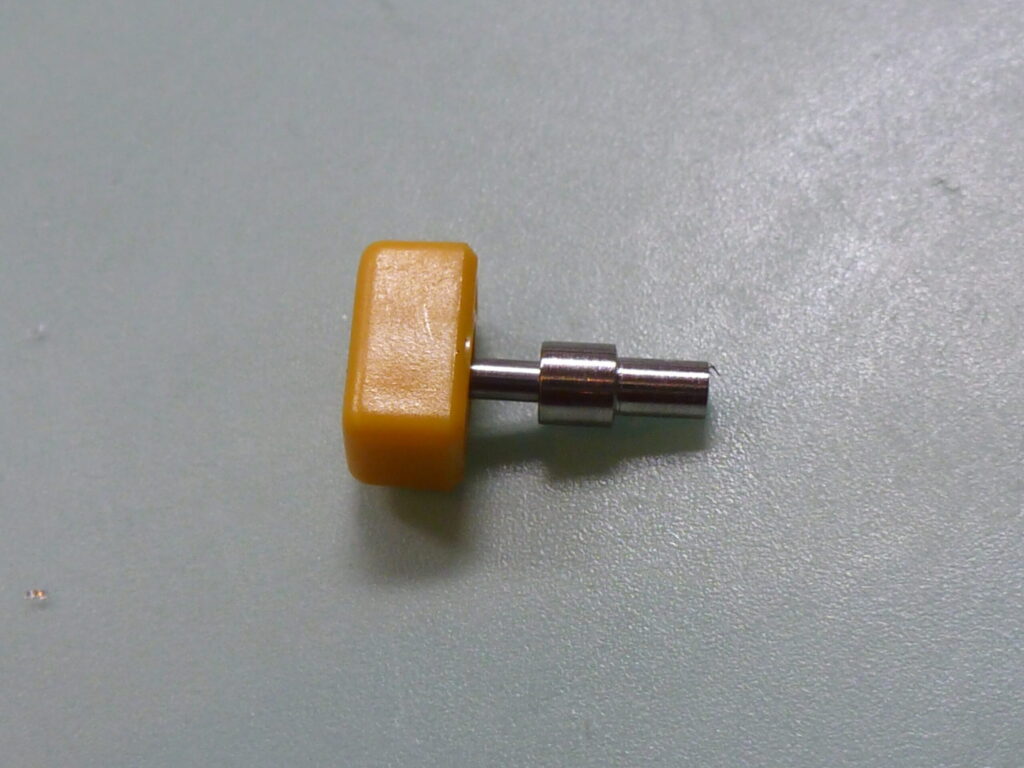


Now the springs and assembly,

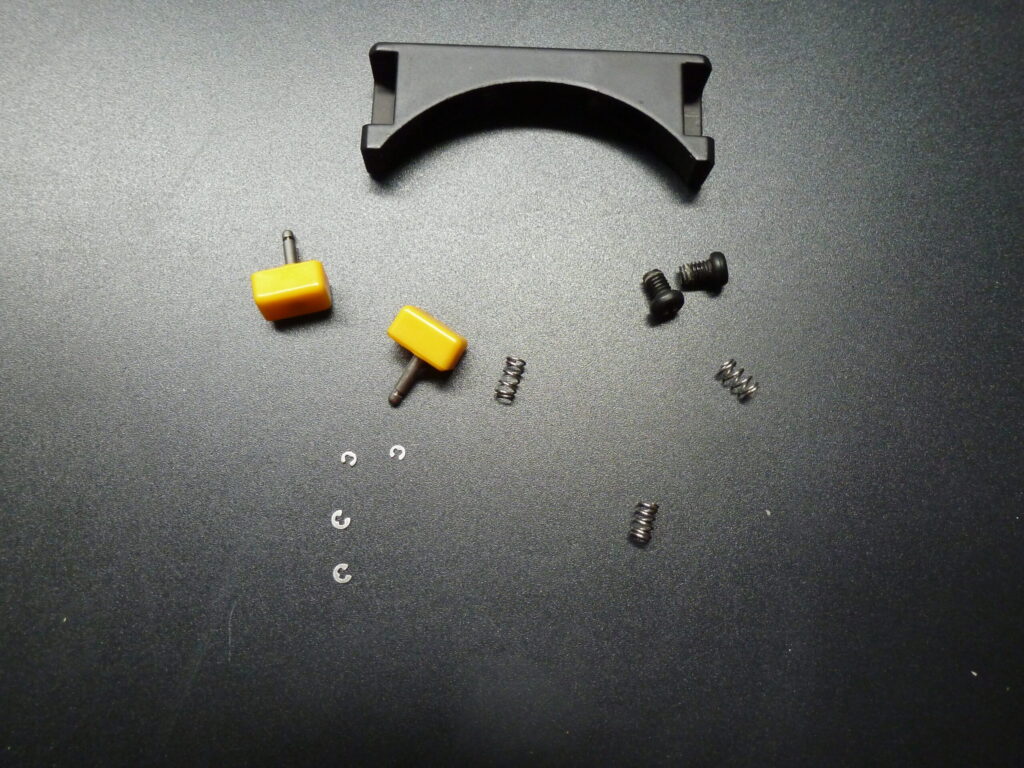
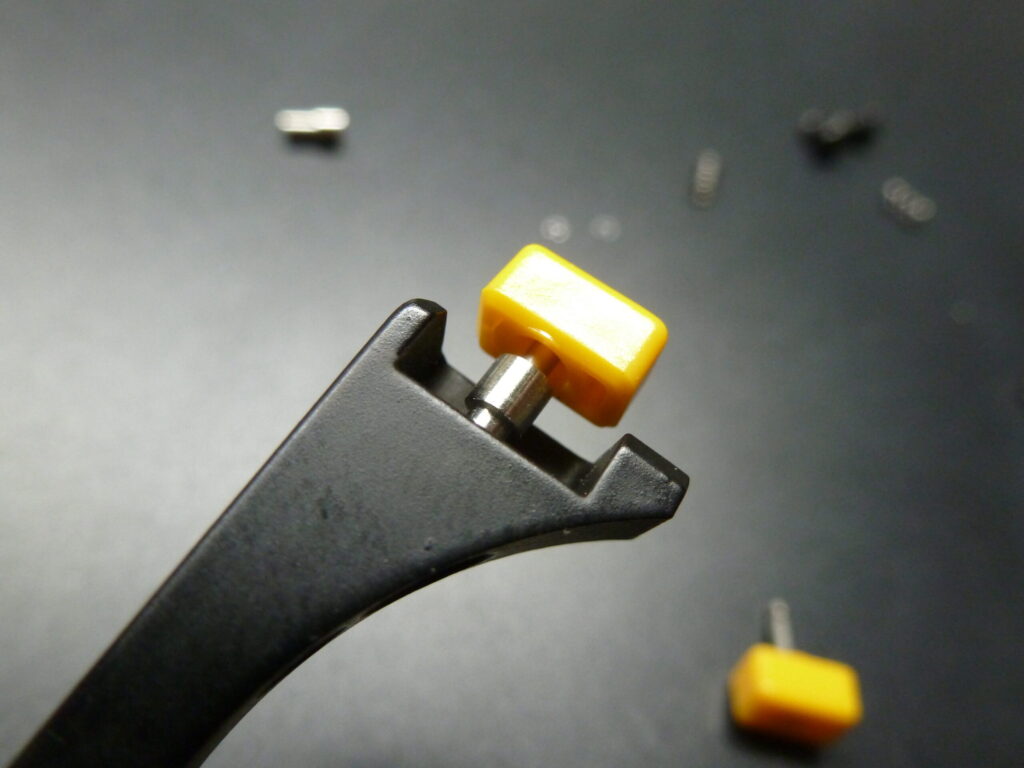

The housing is then simply screwed into the watch case and fortunately I had those screws!
It was at this point Simon noticed my crown & stem bodge. He didn’t like it, to be fair he did not know the trouble I went to get it into that state and assumed it had arrived like this. Somehow in his stocks he had a NOS crown! so kindly donated this and another stem to the watch to complete his part of the task. This was extremely kind of him and I can only thank his generosity.
Once the watch was back in my possession it was just a case of cleaning the bracelet up and wearing it!
I still have to do something with the crystal though as from certain angles it looks like from the inside some coating is coming off. You cannot feel this with your finger so I am a little perplexed however I will in the future remove the crystal and polish with some diamond paste to see if that does the trick.
You might be able to see it here.
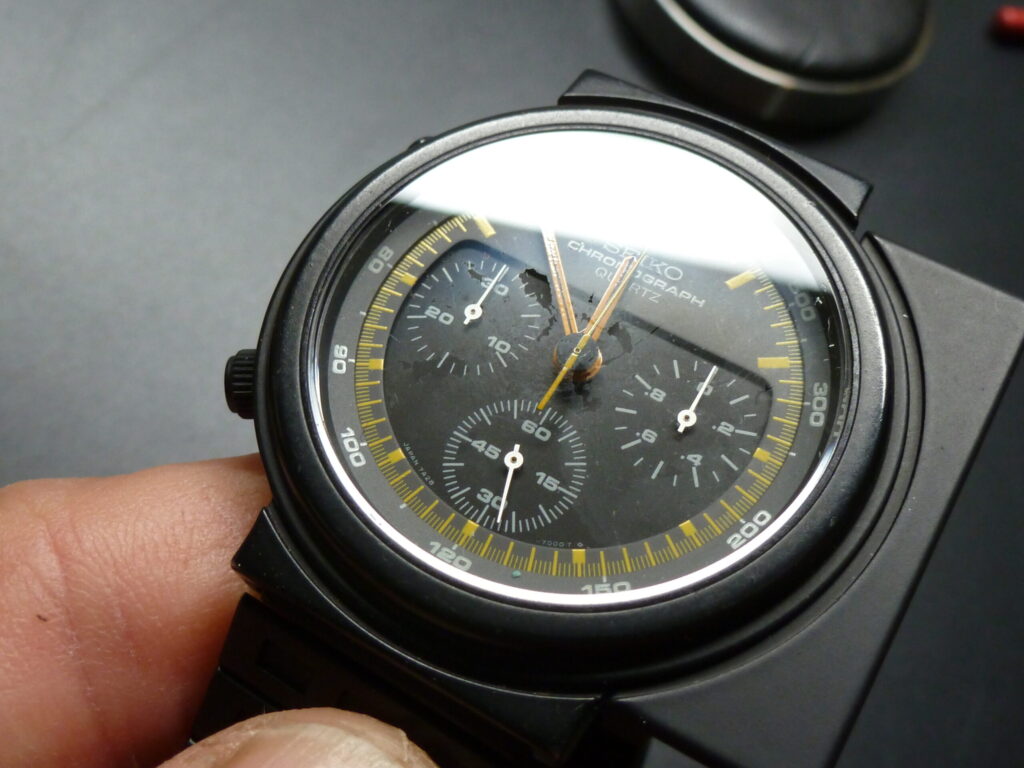
So if you have read to this point in the blog well done and here is the moment you have all been waiting for. The finished watch. Thank you for reading my blog.


All Comments